Data Point Publish
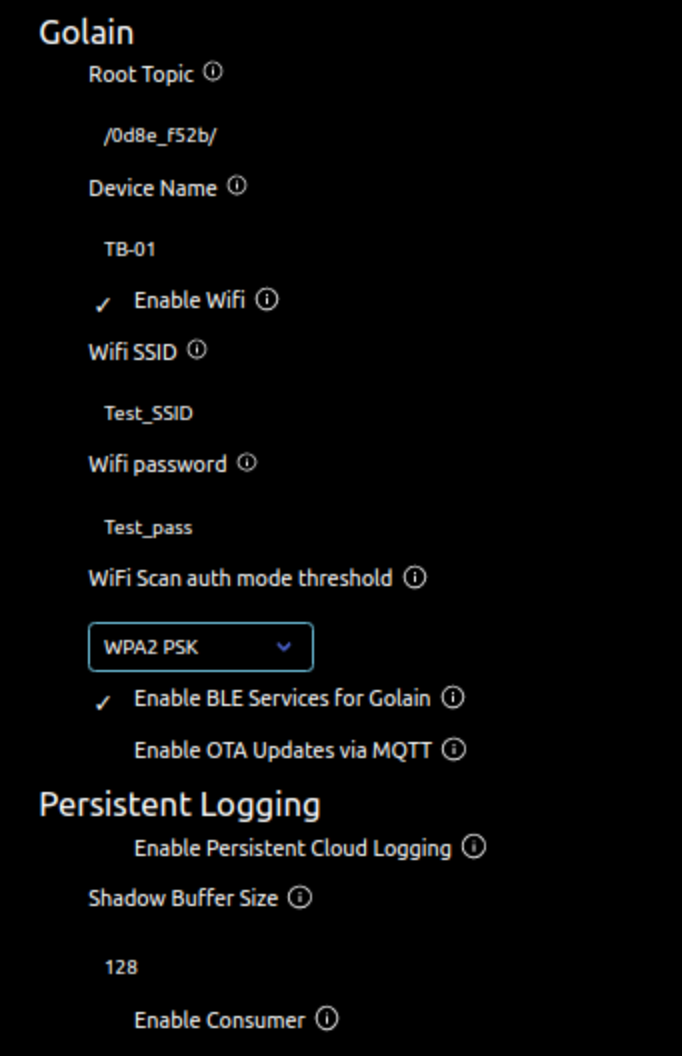
The menuconfig is the same as the previous example.
Menuconfig Settings:

State diagram:
Data point definition
syntax = "proto3";

message MPU{
int32 ax =1;
int32 ay =2;
int32 az =3;
int32 gx =4;
int32 gy =5;
int32 gz =6;
}
note
This data point can be used for storing data from an MPU
Shadow definition
syntax = "proto3";
message Shadow {
    int32 red = 1;
    int32 green = 2;
    int32 blue = 3;
    bool on = 4;
}
note
This shadow can be used to control an RGB LED or strip
Includes
#include "nvs_flash.h" //Required to initialise nvs memory
#include "golain.h" // Golain header
#include "shadow.pb.h" //Compiled device shadow protobuffer
MQTT Certificates
Use the following to get the pointers to your certificate binaries:
extern const char mqtt_device_cert_pem_start[] asm("_binary_device_cert_pem_start");
extern const char mqtt_device_cert_pem_end[] asm("_binary_device_cert_pem_end");

extern const char mqtt_device_key_pem_start[] asm("_binary_device_private_key_pem_start");
extern const char mqtt_device_key_pem_end[] asm("_binary_device_private_key_pem_end");

extern const char mqtt_ca_cert_pem_start[] asm("_binary_root_ca_cert_pem_start");
extern const char mqtt_ca_cert_pem_end[] asm("_binary_root_ca_cert_pem_end");

extern const char mqtt_broker_cert_pem_start[] asm("_binary_mqtt_broker_cert_pem_start");
extern const char mqtt_broker_cert_pem_end[] asm("_binary_mqtt_broker_cert_pem_end");
Create user shadow struct
Shadow shadow = Shadow_init_zero;
Create data point struct
MPU myMPU = MPU_init_zero;
Initialising NVS
nvs_flash_init();
Creating a golain config structure
The following is called inside app_main() in this example;
 golain_config_t golain_config = {

        .shadow_struct = &shadow,
        .shadow_size = Shadow_size,
        .shadow_fields = Shadow_fields,

        .device_cert = mqtt_device_cert_pem_start, //Device certificate
        .device_pvt_key = mqtt_device_key_pem_start, //Device private key
        .root_ca_cert_start = mqtt_ca_cert_pem_start, //Root CA certificate
        .root_ca_cert_len = mqtt_ca_cert_pem_end-mqtt_ca_cert_pem_start, //Root CA Length
    };
- Here, we have added members that we need for device shadow and mqtt.
- Please refer to
golain_config_tfor further information about this structure.
Initialising golain
    golain_t golain = {};

    golain_init(&golain, &golain_config);
- You can find more information about golain_init() by clicking on it.
- The golain_t object can also be defined outside
app_main().
Data point posting loop
 while (1) {
        myMPU.ax = (int32_t)rand();
        myMPU.ay = (int32_t)rand();
        myMPU.az = (int32_t)rand();
        myMPU.gx = (int32_t)rand();
        myMPU.gy = (int32_t)rand();
        myMPU.gz = (int32_t)rand();
        //The above lines fill the data point with random values.

        golain_mqtt_post_data_point(DATA_TOPIC("MPU"), MPU_fields, &myMPU, MPU_size); //Post data point to golain
        vTaskDelay(1000/portTICK_PERIOD_MS); // 1 second delay
    }
- golain_mqtt_post_data_point posts one data point at a time. However, it can be called multiple times to post other data points when required.
- The 1 second interval is arbitrary and can be a lot smaller.
Programming your device:
- Running through command line :
idf.py build
idf.py flash
Guide for programming through ESP-IDF for VSCode: https://docs.espressif.com/projects/esp-idf/en/v4.2.3/esp32/get-started/vscode-setup.html
Guide for programming through ESP-IDF for Eclipse: https://docs.espressif.com/projects/esp-idf/en/v4.2.3/esp32/get-started/eclipse-setup.html